Creating a New TIBCO Scribe® Insight Server

Sometimes it is necessary to move your TIBCO Scribe® Insight Server (that is, the server on which all of your Scribe services run) to a different computer, while leaving the Scribe Internal Database in its current location.

This topic describes the steps to create a new TIBCO Scribe® Insight Server and point it to an existing Scribe Internal Database.

To Move the TIBCO Scribe® Insight Server

  1. Back up all of your data as described in Backing Up Files.
  2. Write down the user login under which the Scribe services are currently running under. This login is needed to duplicate the Scribe services on the new server.
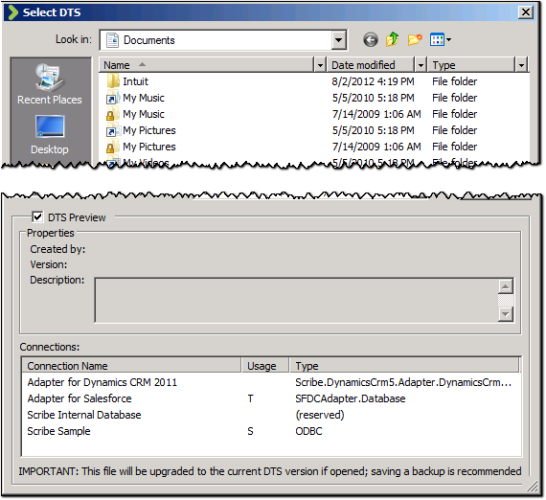
  3. From the Workbench, browse your Collaboration files and note the DSN and other connection information for each DTS file, as follows:

    Note:  
    • You must duplicate the connection information you find in these DTS files on the new server. This may involve tasks such as creating DSNs and updating access to data sources and applications.
    • To create a DSN from within Workbench, you must be running the Workbench as an administrator.
  4. If you are using message queues, make sure that Microsoft Message Queuing (MSMQ) is already installed on your new Server.
  5. Install TIBCO Scribe® Insight and use the InternalDB.exe utility to migrate the data to the new server:
    1. In the Scribe installation directory (..\Scribe), right-click InternalDB.exe and select Run as Administrator. ).
    2. Open the Internal Database tab. To validate that the connection to the database is live, click Test Connection.

      Note: If Update Internal Database is enabled, click it. After the Internal Database has been upgraded, click Test Connection again.

    3. Click Update Insight Server Name. The Scribe Database Setup dialog box appears.

      Note: If the Stop Scribe services message displays, click OK to stop the Scribe services and close the message.

    4. In the text boxes, enter the names of the old and new Scribe Servers, then click Update Server Name to update the Server name within the Scribe Internal Database.

      Note: Once this step has completed, you can open Workbench and register TIBCO Scribe® Insight.

    5. When you are done, click Back to save your changes and close this dialog box.
  6. On your new Scribe Server, recreate the Collaboration folders with the original names and structure. By default, these folders are under *\Public\Public Documents\Scribe.
  7. Copy the DTS files from the Collaboration folders on the old server to their respective Collaboration folders on the new server.
  8. Open the first DTS file for each collaboration, connect to the appropriate database, DSN or Adapter, and when prompted, click Yes to make the change to the remaining DTS files in the folder.
  9. Open each of your DTS files to validate your connections.
  10. From the Console, open and browse through the Integration Processes, Monitors, and Data Views for each collaboration to verify that they look as expected.
  11. Test your Collaborations by running them in a Test environment.

Warning: Do not use Insight with the new Server in production until it has been thoroughly tested in a test environment.