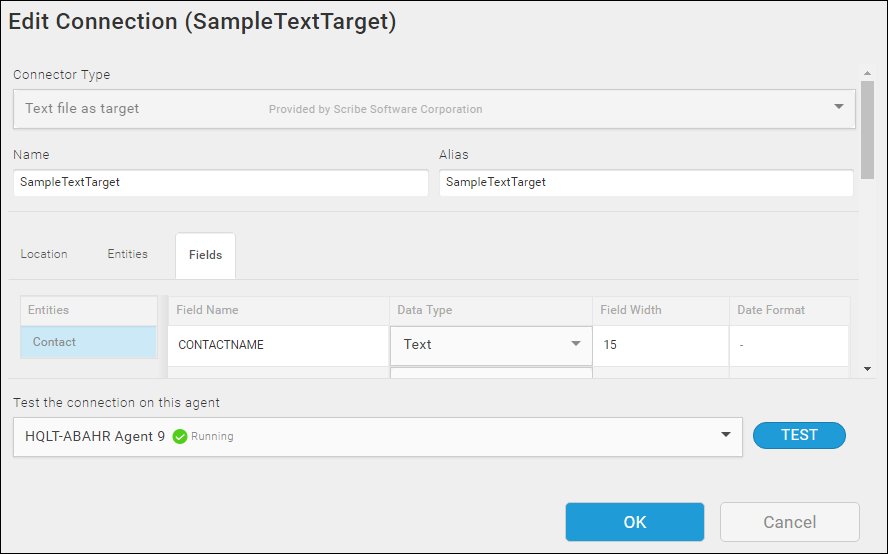
Target Text Connection — Fields Tab
The Fields tab on the Text Connection dialog displays the field names for the entities configured on the Entities tab.
From the Fields tab, you can:
- Make changes to the Field name and data type of individual fields in your text file.
- Revert all of your fields to the original source names and formats.
- Reset metadata using the Refresh Schema option on the Gear menu for the Entity.
- Add or delete fields from your text file using the Add above, Add below, or Delete options on the Gear menu for the Field row.
Accessing The Fields Tab
- Select Connections from the menu.
- Select the Create button
 to add a new Connection or select a Connection name to edit an existing Connection.
 - Select the Fields tab.
Configuring The Fields Tab
Existing Target File
- Select an Entity Name in the left pane.
- If this is the first time you are accessing Fields for the entity, select the Generate fields schema from your data link in the right pane to display the associated fields.
- Select the Field Name and type over the name to modify it if necessary.
- Use the Fields Tab Fields table below to configure the properties for the selected Field.
- Select OK to save the Connection.
Generated Target File
- Select an Entity Name in the left pane.
- If this is the first time you are accessing Fields for the entity, select the Add fields manually link in the right pane to display the associated fields.
- Select the Field Name for the default field and type over the name to modify it if necessary.
- Use the Fields Tab Fields table below to configure the properties for the selected Field.
- To add a another field, select an existing field to display the Gear menu for the row.
- Select either the Add above or Add below option on the Gear menu.
- When the new field is displayed, use the table below to configure the properties.
- Select OK/Save to test and save.
| Field | Definition |
|---|---|
|
Entities |
List of Entities configured for this Connection on the Entities tab. Each Entity represents a separate text file. |
|
Field Name |
Name of the field for the selected Entity. If you did not select Field Names in the First Row option on the Entities tab, the field names display as numbered fields, such as Field1, Field2. If the target text file does not exist because you plan to generated when the associated flow executes, no Field Names are displayed. You must add them manually. Type over the Field Name to edit it. |
|
Data Type |
The data type for this field. If Date/Time is selected, additional options display. |
|
Field Width |
Set the length of the field. Note: Width cannot be shorter than the Field name.
|
|
Date Format |
Displays only when Date/Time is the selected data type. Type a format in the Date Format field. For more information, see Text Connector DateTime Formats. |
|
Pad |
For fixed width files, add extra spaces if the field is shorter than the heading. From the drop-down list, select: Right — Add extra spaces to the right of the field. Left — Add extra spaces to the left of the field. |
|
Width Exceeded |
For fixed width files, if the data in a field is longer than the specified width: Fail — Fails the record. Ignore —Truncates the data in the record and continues processing without an error. |
Related Topics
TIBCO Scribe® Online Text File As Target
Configuring Text File As Target Connection