
Wait For Request Block
The Wait For Request Block provides two important features for Request/Reply Maps:
- After you save the Map the first time, TIBCO Scribe® Online generates a unique Endpoint URL which displays on the Block Properties — General tab. This may take a few minutes. You must copy and paste the URL into a location in the source application as described in Defining An Event Request/Reply Map.
- From the Request tab, you can describe the fields that you want to request from your source application.
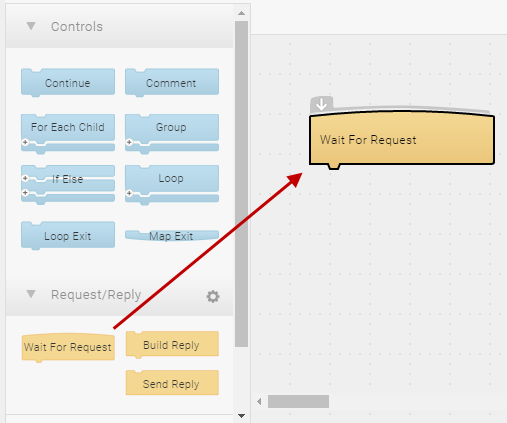
To begin designing an Event-based Request/Reply Map, your first step is to drag the Wait For Request Block from the Connection panel to the workspace.
Block Properties — General Tab
After you have moved the Wait For Request Block to your workspace, you can begin to design the request for this Map.
- Select the Wait For Request Block.
- From the Gear menu
 select Edit to open the General tab of the Block Properties dialog.
 - Optionally change the label and add a description as described in Block Properties General Tab.
- Select OK to close the Properties page.
- Select OK to save and close the Map. After saving the Map the first time, TIBCO Scribe® Online generates a unique Endpoint URL which displays on the General tab. This may take a few minutes.
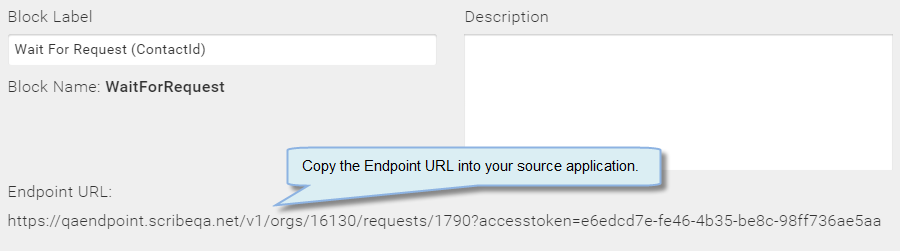
- Once you have saved the Map, you can copy and paste the Endpoint URL into a location in the source application as described in Defining An Event Request/Reply Map.
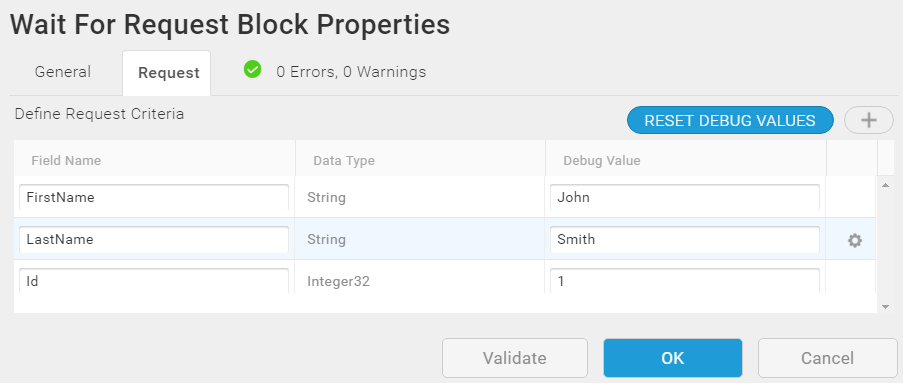
Block Properties — Request Tab
From the Request tab, specify one or more fields that you want to request from your source. The source can be any datastore that can consume a SOAP-based web service.
Note: The Request tab supports a maximum of 250 fields. If more fields are required, use a second Map.
- From the Request tab, select Add
 . A new row displays with default values.
 - Edit the sample record for your requirements:
- Field Name — Change the field name or leave it as is. TIBCO suggests that you edit the field name to reflect the name of a field that you request from your source.
- Data Type — Data type for the requested field.
- Sample Value — Sample value that is valid for the selected data type. When you use the Debugging Maps feature, TIBCO Scribe® Online uses the sample value to test your Map.
- Create as many fields as you need.
In addition, from the Request tab, you can:
- Select a row and select Delete from the Gear menu to remove it.
- After using the Debug feature, select Reset Debug Values to reset all of your request fields to the sample values.
Block Properties — Errors And Warnings Tab
If there are any errors or warnings for this Block, the Errors and Warnings tab displays the number of errors or warnings in the tab name. See Block And Map Errors And Warnings.
Once you have corrected the errors, select the Validate button to update the Errors and Warnings tab.