Request/Reply Map Example
For this example of using a Request/Reply Map, assume you are writing a custom application and you want to display Contact data with any associated Address data for each Contact. Some Contacts have multiple Address records. Use a Request/Reply Map in your CRM system to provide that data through a REST service.
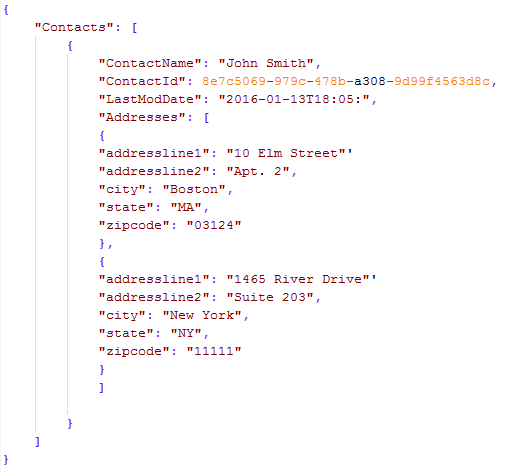
For this example, you have a ContactId and you want to display the Contact’s name, the last modified date of the Contact entry in your CRM system, and any Addresses for that Contact. Create the following Event Request/Reply Map in TIBCO Scribe® Online to retrieve the data needed in one call as a JSON object:
Building The Map
- Navigate to the Solutions page and from the Add
 menu select Integration Event.
 - At the top of the Solution Edit page enter a name for the Solution.
- Select an Agent from the Agent drop-down.
- In the Maps section, select Create Request/Reply Map from the Menu
 . The Map dialog the workspace displays.
 - Add Connections to the Connections panel. The Blocks you need to build your Map display beneath each Connection name.
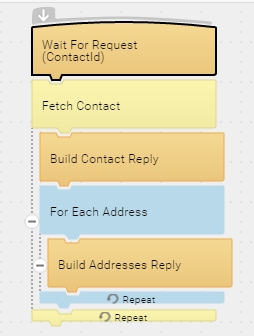
- Move a Wait For Request Block into the workspace.
- Select the Wait For Request Block.
- From the Gear menu
 select Edit to open the General tab of the Block Properties dialog.
 - Change the label to Wait For Request (ContactId).
- Select OK to close the Properties page.
- Select OK to save and close the Map. After saving the Map the first time, TIBCO Scribe® Online generates a unique Endpoint URL which displays on the General tab. This may take a few minutes.
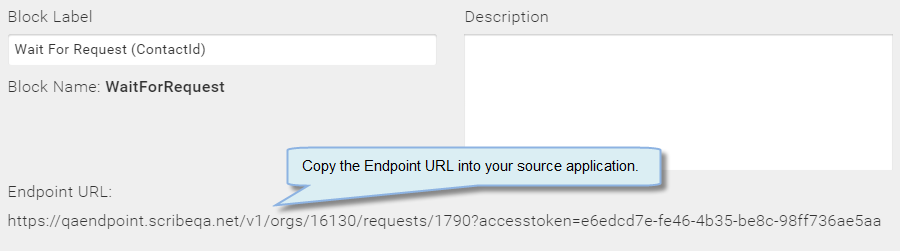
Note: Once you have saved the Map, you can copy and paste the Endpoint URL from the Wait For Request Block's General tab into a location in the source application. This URL allows your application to communicate directly with this specific Map in TIBCO Scribe® Online.
- Open the Map again and select the Wait for Request Block.
- From the Gear menu select Edit
- Select the Request tab on the Properties dialog. Specify the request, which in this case is ContactId, and the data type is Guid. The Debug value is used only for Debug, but the format should match the data type you selected.

Later, when you call the Endpoint URL specified in the Wait For Request Block, you can pass in these inputs as a JSON object in the POST body of the REST API call, as follows:
{
ContactId: 8e7c5069-979c-478b-a308-9d99f4563d8c
} - After the Wait For Request Block, the next Block is a Fetch Block that filters Contact data by ID on the Filter tab. Fetch also leverages the Include tab to use the Contact to CustomerAddress relationship in your CRM system to look up all related Addresses for that Contact entry.
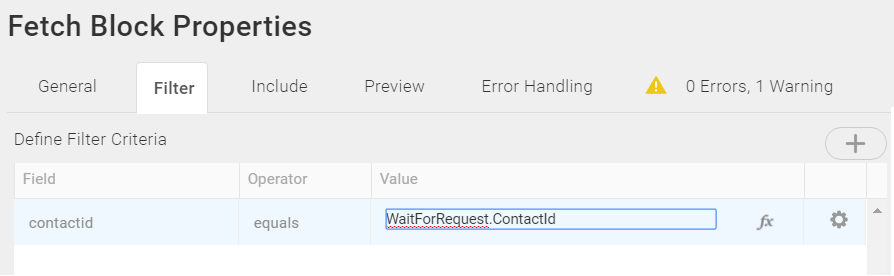
Fetch Block — Filter
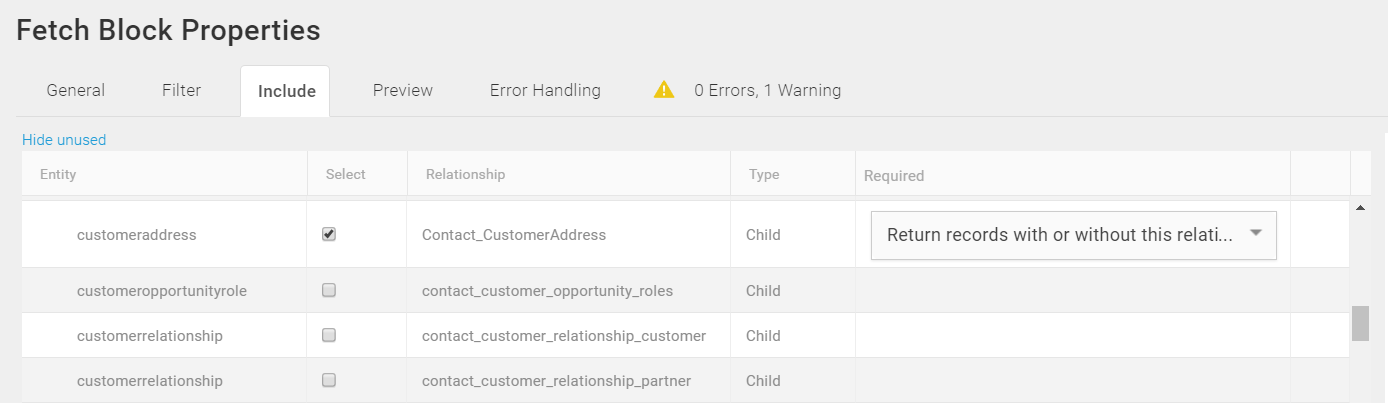
Fetch Block — Include
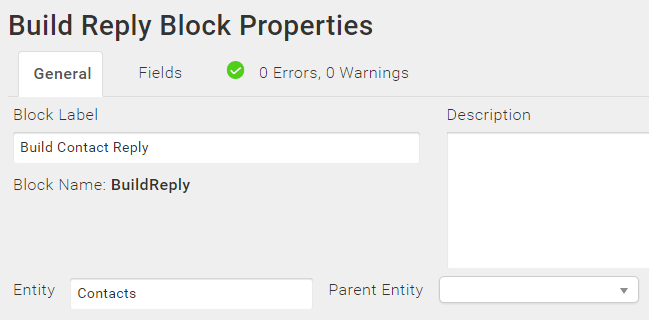
- Inside the Fetch Contact Block, use a Build Reply Block to create the top level of the data hierarchy. In the Entity field, type Contacts. Since Contacts, note the plural name, is at the top level, it does not have a Parent Entity and the Parent Entity field cannot be configured:
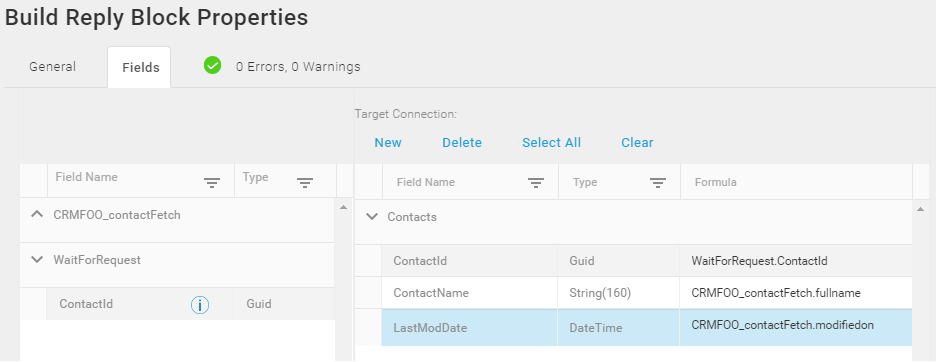
- In the Fields Tab for this Build Reply Block, specify that ContactID, ContactName, and LastModifiedDate that are in the reply. Use the New link to add a row to the Target Connection for each field, ContactID, ContactName, and LastModifiedDate. Map the corresponding source fields on the left to the target fields on the right. This mapping is what builds the reply.
At this point, if you ran the Map with just the Build Contact Reply Block, the Reply would be similar to the following:

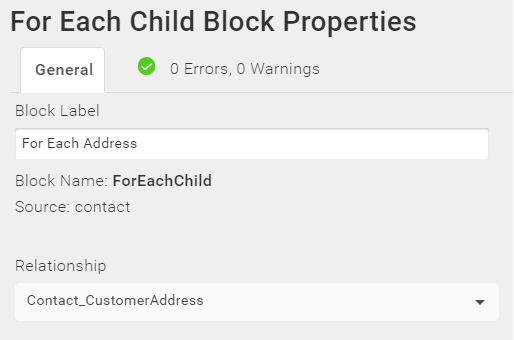
- However, you want the Reply to include both Contact names and addresses. A Contact may have more than one address, so use a second Build Reply Block inside a For Each Child Block to build up the addresses. For the For Each Child Block, configure the General tab to retrieve data from the related Contact_CustomerAddress entity configured in the Fetch Block.
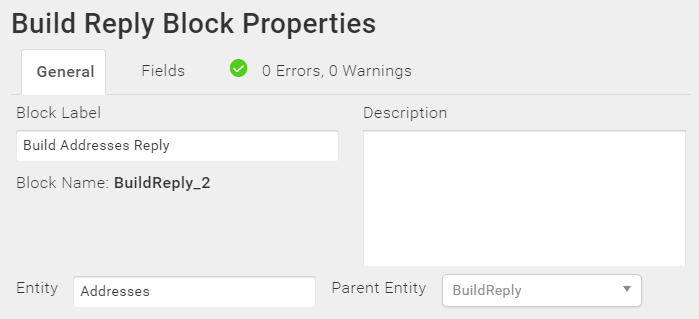
- For the second Build Reply Block inside the For Each Child Block, in the Entity field type Addresses. Use the Parent Entity field to specify the Build Contact Reply Block, which displays only as BuildReply. This causes the Addresses to appear as children of the Contact.
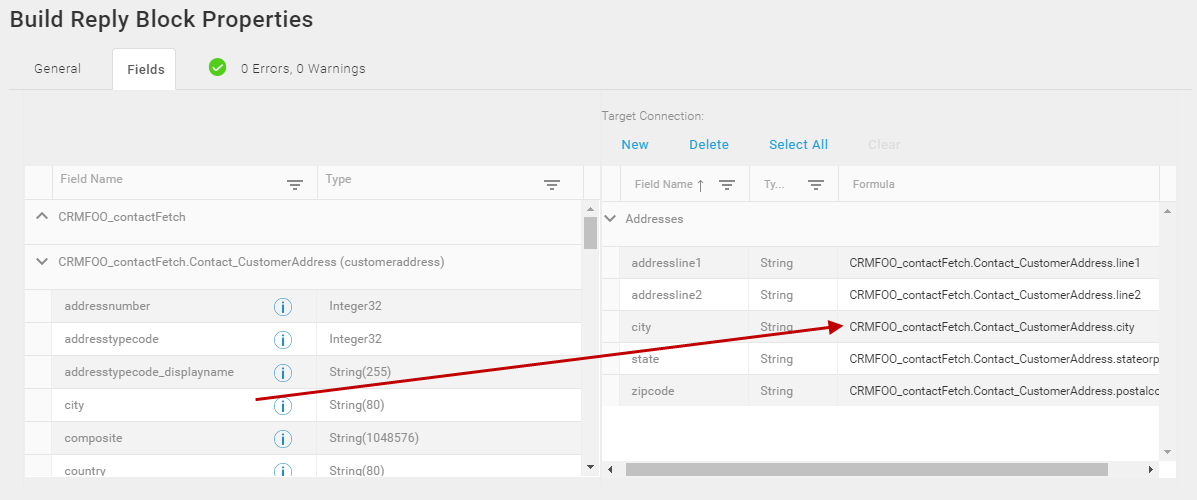
- And then, map only the Address fields required by the target CRM datastore:
Which, when you call the Endpoint URL from your custom application, return the hierarchical reply expected. For example: